Tampilkan postingan dengan label Wild West Exodus. Tampilkan semua postingan

Wild West Church and Water Tower

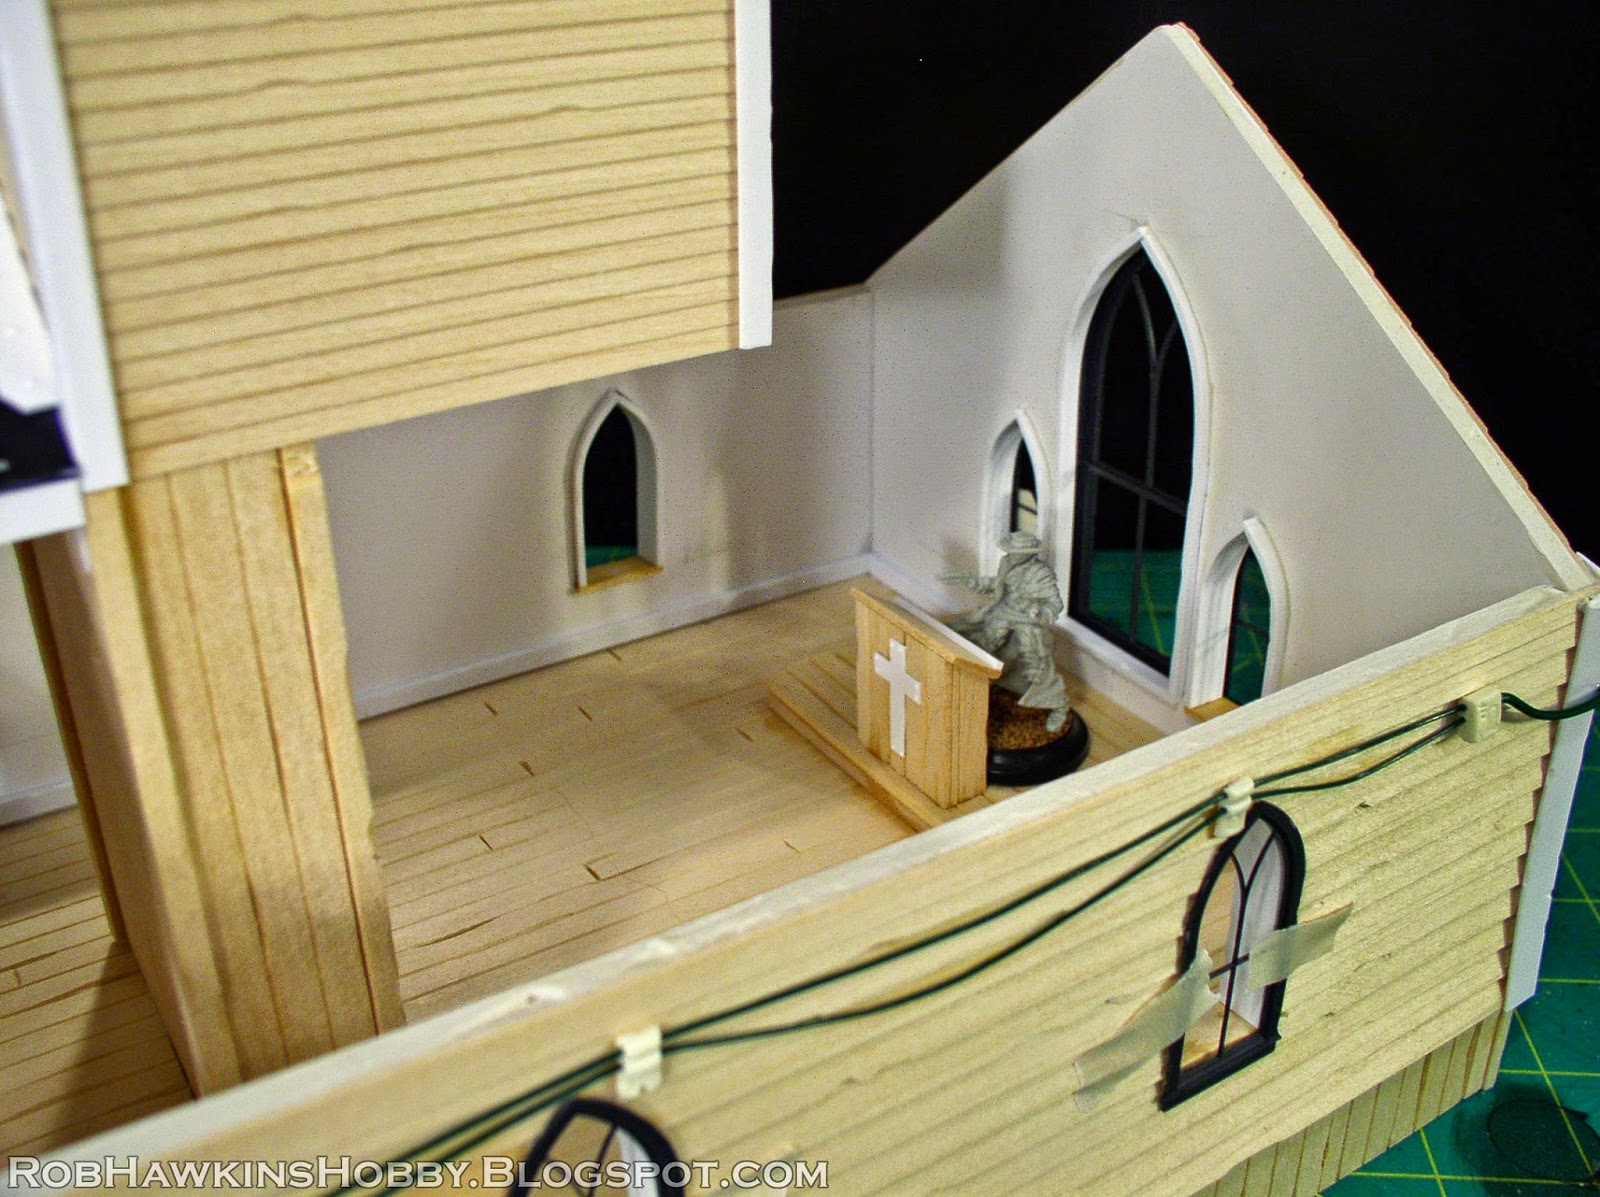
I recently finished some new Wild West Exodus-themed terrain. Here's a look at the pieces in progress. You can see more detail shots of the finished terrain in my Wild West Exodus terrain gallery.


Old West Church


The construction uses a foam core frame, with basswood siding and framework.


The doors are my own resin-cast assets, and the windows are Grandt Line plastic accessories.


All the wiring is made from heavy gauge floral wire, with resin cast tech accessories.


The roof is covered with plastic card "sheet metal" and lifts off for access to the interior.


Water Tower 


This water tower is constructed from basswood planks.


The water spout is made from plastic tubing, with more resin tech parts. One of the best things to happen as a result of the Steam Punk craze is all the costume accessories now available at craft stores. Things like these little gears and clock faces are great for terrain.


I made the roof of the water tower with plastic strips for the support structure and wood chits, scored with a wood grain for the shingles.


Check out the Wild West Exodus terrain gallery for all the detail shots of the finished water tower and Church!


'Til next time!

WWX and Terrain Gallery Updates

The terrain galleries have been sorted out and reorganized. I'm keeping Wild West Exodus and Wrath of Kings in their own galleries due to the volume of work I've done for each system. Everything else is in the Main Terrain Gallery.


The gallery page now has a single shot of each table which links to a sub page of detail shots. Hopefully that's easier to navigate than scrolling through miles of images to find the ones you want. I've also gone through the No Man's Land and Lustria Revisited photos and color-corrected them to eliminate the awful yellow hue they were suffering from. (I also added more rocks in front of R2-D2 and digitally inserted Jabba the Hutt into every shot.)


The Rivet Wars diorama has been added to the gallery, with previously unreleased detail shots, so be sure to pop in and check those out.


Wild West Exodus Buildings


Here are some images of the finished WWX demo table commissioned by Outlaw Miniatures. This is a 2'x2' table, with the buildings magnetized to a sand-textured GW Realm of Battle board section.


The Wild West Exodus Terrain gallery has more detail shots of each building. If you missed the construction of the buildings, here's a link to my previous blog post More Wild West Exodus Buildings.  


Coming up, I'll have a tutorial on how to make and paint neon signs.


'Til next time!

More Wild West Exodus Buildings

Here's a look at another project I've been working on for Outlaw Miniatures. These buildings are for an upcoming demo table. They're fronts, and will line the sides to form a town street, perfect for a showdown at high noon.


Building the Buildings


I haven't really done any step-by steps for the Wild West buildings, so here's a little insight into their underlying construction.


Once I frame out the basic structure with foam core, I build up a boardwalk by stacking a few layers. These are glued to the building front, and the sides are framed out with basswood strips. The stairs are also made from layered foam core, with basswood siding and trimmed popsicle sticks for the tops.


The siding is done with textured basswood panels– in this case it's angled siding. I trim the pieces to fit the building and cut out holes for the windows. The windows themselves are plastic model railroad windows (O-Scale, I think).


I also cut a space in the siding for the doors. The doors are my own scratch-built and resin-cast creations.


If the building has a balcony, I'll add that next, using foam core for the flooring and square basswood for the support posts. The posts extend up oast the floor because they will also form the corner posts of the railing. In this shot you can also see some brick-textured styrene that I used for the building's foundation below the wood siding. The bank above uses this for the entire first story; banks need to be a little more sturdy.


To plank the boardwalk and balcony I use more popsicle sticks, trimmed to size and distressed. These are also cut to fit around the posts.


The front wall of the building usually extends above the roof to accommodate the sign. The top is framed with thick styrene and basswood. The styrene is scored with a knife to create the wood grain texture. The roof itself has been covered with rivet-punched styrene sheets resembling a sheet metal structure.


For the railings, I mark and drill out small holes for the balusters.


The balusters are cut from thin matchsticks.


The balusters are pushed into the holes and a strip of thin, square basswood is glued overtop to form the railing.


For the finishing touch, I insert a pin into the corner post and glue a round bead overtop.


With the railing complete, I add the tech details like wiring, lights, and neon signs.


In an upcoming post I'll show off the finished building, along with a terrain tutorial for painting neon signs.


'Til next time!

Older Post ►
 

Copyright 2011 My Unique Hobby is proudly powered by blogger.com