Painting The Desert Mesas
Last week, I showed you how to model desert mesas. This time I'll cover painting and adding vegetation to finish off the terrain.
Painting
The mesas are painted fairly simply using three main colors and a dark brown wash. For reference I'll compare these colors to Formula P3 Bloodstone, Moldy Ochre, and 'Jack Bone, but use a latex paint that closely matches the color rather than actual miniatures paint (unless you want to empty twelve pots of paint to cover the terrain).
Step 1) Start by painting the entire surface of the ground and mesas with Bloodstone. The latex paint will help seal the foam and add a little durability.
Do your best to get the paint in all the nooks and crannies, but a few exposed pink areas are going to be inevitable. This will be addressed in the next step.
Step 2) Mix a wash of P3 Brown Ink, Armor Wash, Battlefield Brown, Mixing Medium, and water. Paint this over the surface of the rocks, making sure to get it in all of the recesses. Blot the wash off the raised surfaces with a paper towel to avoid darkening the color too much.
Where the base of the mesa meets the ground, apply some wash, and feather it outward with a wet brush to create a blend from dark to light. After the wash has dried, give the piece a look over to make sure there are no "bald spots" left in the recesses. If there are, paint more wash, or Battlefield Brown directly into the spot with a smaller brush.
Step 3) Now drybrush over the entire piece with Bloodstone again to recapture the color. I use a 3" brush for a majority of the drybrushing, and a 1" brush when working in tight areas.
Step 4) Next, drybrush the terrain with Moldy Ochre. Go a little heavier with the paint on the ground (but still keep it dry to avoid streaks and brush strokes). Normally I'd say to not worry about any imperfections in the ground painting because you can cover them with static grass or flock, but the desert will be pretty sparse of vegetation, so the ground painting needs to stay clean and controlled.
Step 5) Finally, drybrush everything with 'Jack bone. Brush over the rock faces using a downward stroke to keep this final highlight mostly on the top edges.
Desert Vegetation
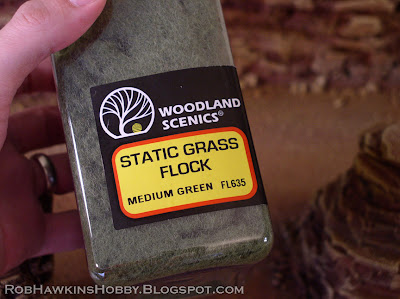
To add a little color to this desert scene, use Woodland Scenics "Medium Green" static grass.
Step 1) Apply the grass by first painting in some patches of wood glue thinned with a little water.
Step 2) Sprinkle the grass generously over the glue patches and press it down gently with your hand. Pressing the grass will ensure that it penetrates into the glue and you'll get a nice, thick patch of grass.
Step 3) Once the glue has dried, shake off the excess static grass. Be sure to collect it up to use again. Then, attach some shrubs. (I prefer Woodland Scenics' "foliage clusters" over their "clump foliage." The clusters provide larger chunks of foliage from which you can tear off appropriately-sizes pieces. The clump foliage tends to be more crumbly, and falls apart easily.) Simply tear off a piece and attach it with a dot of super glue.
Step 4) Drybrush the grass and shrubs with Moldy Ochre.
Step 5) Add a final drybrushing of 'Jack Bone, and the vegetation is finished!
Desert Trees
The dead trees are made from Woodland Scenics plastic tree armatures. Trim some pieces and bend them into shape. Using double-sided tape, attach the trees to a stick and prime them black. Then give them a dusting with Model Masters sprays Light Earth and Panzer Grey.
Select a drill bit that matches the diameter of the tree's base, and drill a hole in the table.
Apply super glue to the base of the tree and press it into the hole. (Note: if your table base is plastic or wood, super glue will work fine. If the table is made from foam, use hot glue or Liquid Nails to attach the trees so the super glue doesn't dissolve the foam.
And that's all there is to it! These techniques can be applied to free-standing modular mesas and would be perfect for wild west scenery, or post apocalyptic "Mad Max" style terrain. (Looking at you, Ork Speed Freaks!)
'Til next time!


